Installation Instructions
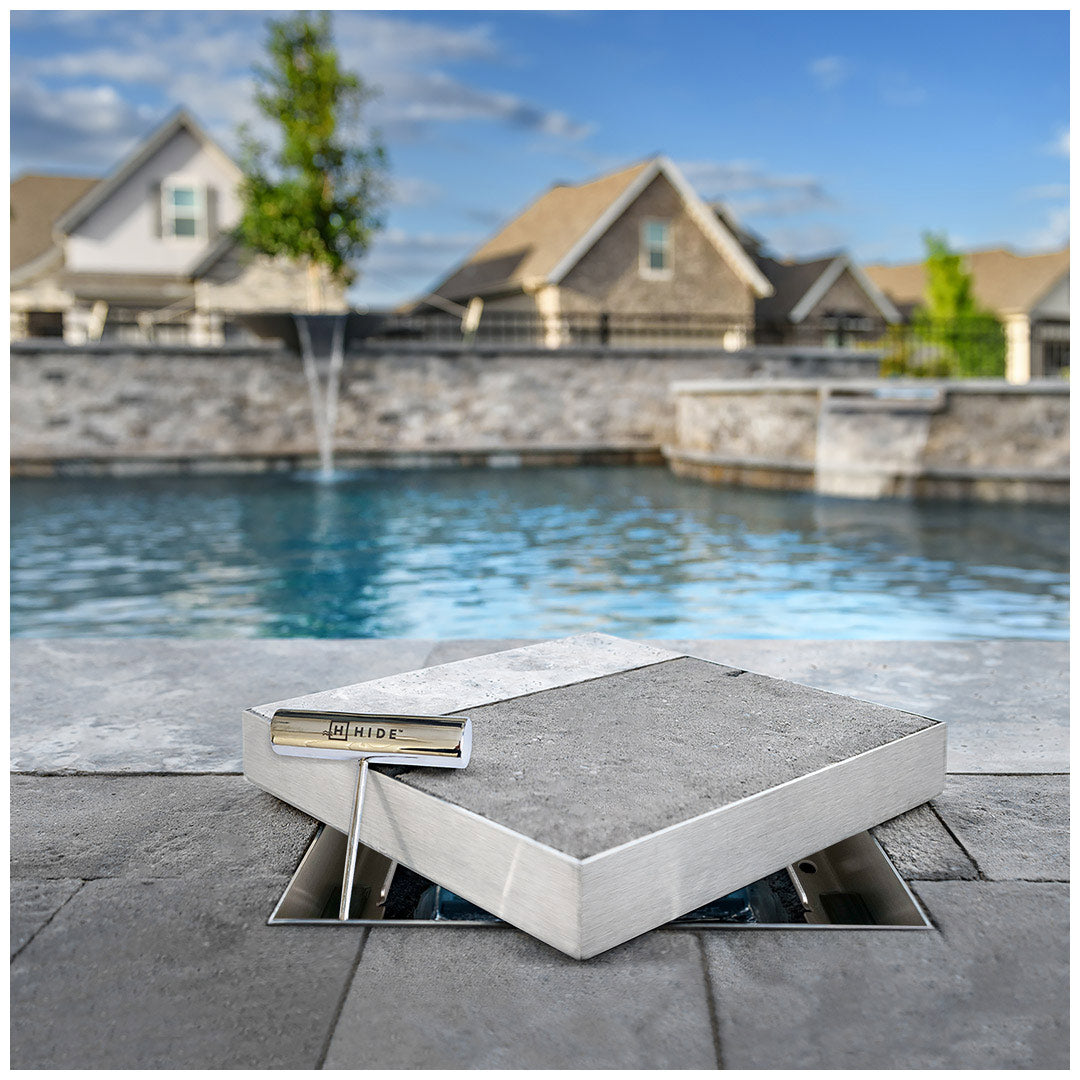
Welcome to your complete resource for installing a HIDE Access cover including Skimmer Covers, Drain Covers and Manhole Covers. Here you'll find expert tips, practical advice, and helpful videos to guide you step-by-step through the installation process. Whether you're a seasoned professional or tackling the project for the first time, our straightforward instructions make installation simple and stress-free.
 |
 |
 |
|
Safety & Maintenance Homeowner PDF |
Installation Instructions Contractor PDF |
Installation Instructions Mobile friendly PDF |


Introduction
Each HIDE kit contains comprehensive installation instructions (or a QR Code linking you to them), diagrams, and a list of standard contractor tools required to complete the installation. The process is quick and easy for a professional contractor.
Please ensure you have engaged a licensed, suitably experienced contractor to install the HIDE product. Before commencing the installation, please ask your contractor to read the Installation manual thoroughly and follow the instructions closely when fitting.
The installation instructions outline essential steps, such as adding expansion gaps and employing other best-practice methods, to achieve the perfect result every time.
A contractor’s failure to comply with the correct installation instructions will void your 10-year warranty. You and your contractor can download information from the links below.
Watch the Installation Walkthrough
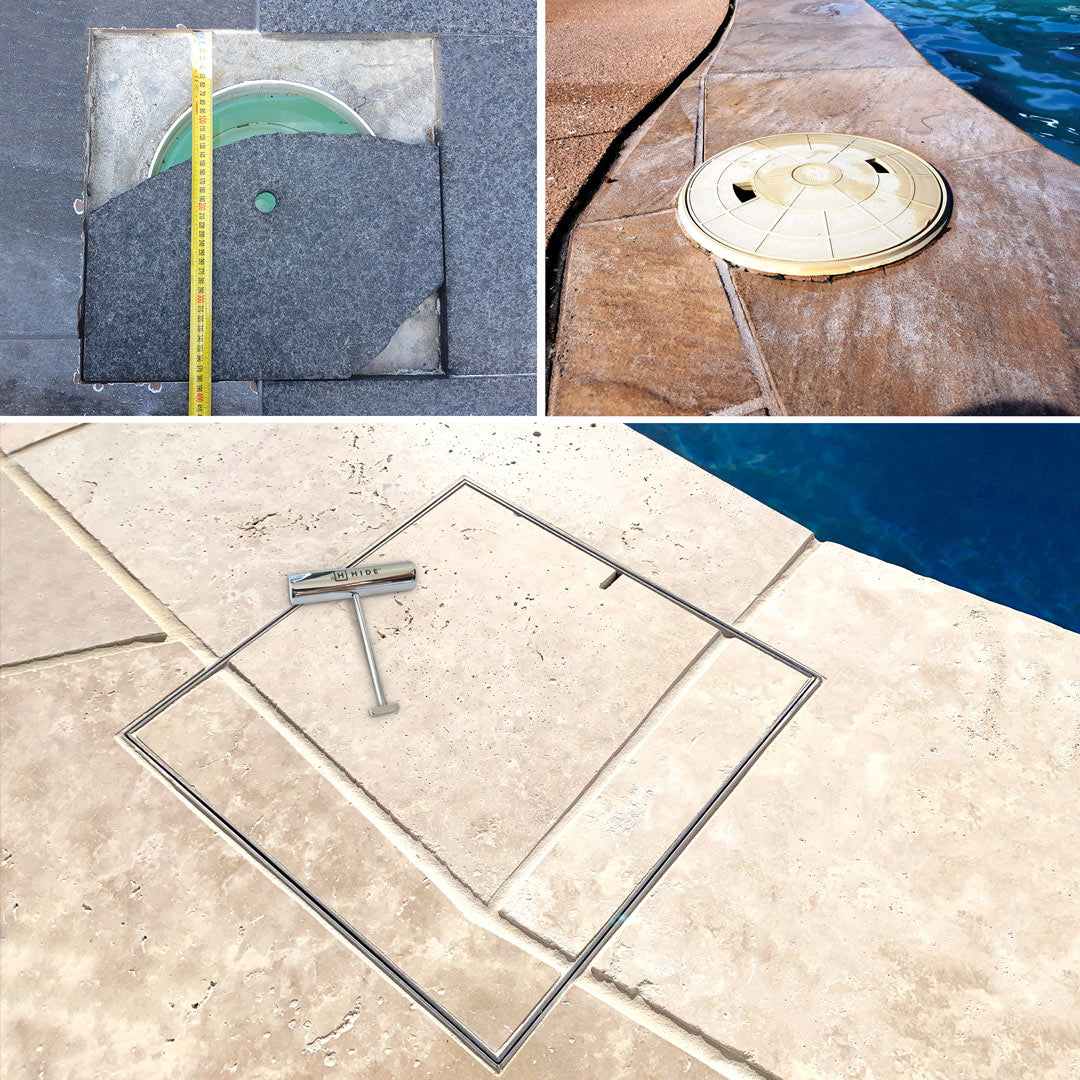
Begin with a concise 5-minute video that guides you through each step of the installation. Although the video demonstrates a retrofit by removing an old round plastic lid, its clear instructions and tips are valuable whether you’re retrofitting or installing the HIDE Cover on a new pool.


Step one:
Determine the kit sizes you need
The HIDE product range includes Skimmer Covers, Access Covers, and Drain Covers.
Begin by identifying the external access points and drains you need to cover, and measure the dimensions of each opening. This ensures you select the correct kit sizes for a secure and effective installation.

Step two:
Understand the Inlay Thickness of Your Materials
Access covers may be required in different areas, such as your pool and landscape. Note that the hardscape materials in these areas can vary in thickness. For example, your pool might have 20mm thick coping where a cover is needed, while your alfresco area could have a substantially thicker concrete surface. Simply choose HIDE Kits that are suited to the specific material depth in each area.
Download the Tech Pages below for a list of available sizes and kit depths.


Step three:
Measure the Underside Opening
The 'Underside Opening' refers to the width of the opening at the bottom of the Edge Protector. This measurement is slightly smaller than the overall kit size. For precise values, refer to the 'Underside Opening' column (G) in the Technical Documents below.
Pro Tip: When selecting a kit for your Access or Drain opening, opting for a kit that is slightly larger than the measured opening is acceptable. This ensures you have unobstructed access and prevents issues associated with an overly tight fit.
HIDE Kits are engineered for flexible installation, allowing you to position the cover off-center if desired to best accommodate your tile finish or design preferences.
HIDE Covers - Product Specifications & Inclusions

Skimmer Cover
Product Codes, Sizes & Dimensions (PDF)

Access Cover
Product Codes, Sizes & Dimensions (PDF)

Drain Cover
Product Codes, Sizes & Dimensions (PDF)

Concrete Cover
Product Codes, Sizes & Dimensions (PDF)
Learn more
Remember: Allow for expansion gaps during installation.
Do not grout the inlay material tight against the lid or frame — a small gap is required to allow for natural expansion and contraction, ensuring a long-lasting, high-quality finish.
Want to become a HIDE Master?
The installation instructions outline essential steps, such as adding expansion gaps and employing other best-practice methods, to achieve the perfect result every time.
What's in your kit?
Getting to know what makes HIDE so great
Inlay Lid
High-Quality Construction for Durability and Aesthetics
HIDE exterior covers are constructed from marine-grade 316 stainless steel, known for its durability and resistance to corrosion. The fully welded corners ensure lid rigidity and prevent twisting, while all internal corners are rounded to facilitate close tolerance fitting of the inlay materials.
Versatile and Seamless Integration
The Inlay Lid can be fitted with a variety of materials such as tiles, pavers, decking, or concrete, chosen specifically for your landscaping project. This allows for a seamless, flush finish that integrates perfectly into your landscaped area. Additionally, the design protects the inlay materials from chipping or breakages when the lid is opened or closed, enhancing both functionality and longevity.
Installation Considerations
- Expansion and Contraction - To accommodate the natural expansion and contraction of the steel, it is important not to fill the void between the lid and the inlay material with grout or other fillers. Careful cutting of the stone is essential to ensure a neat finish. As specified in our installation instructions, a small gap must be maintained between the lid and the inlaid stone to prevent any pressure or damage.

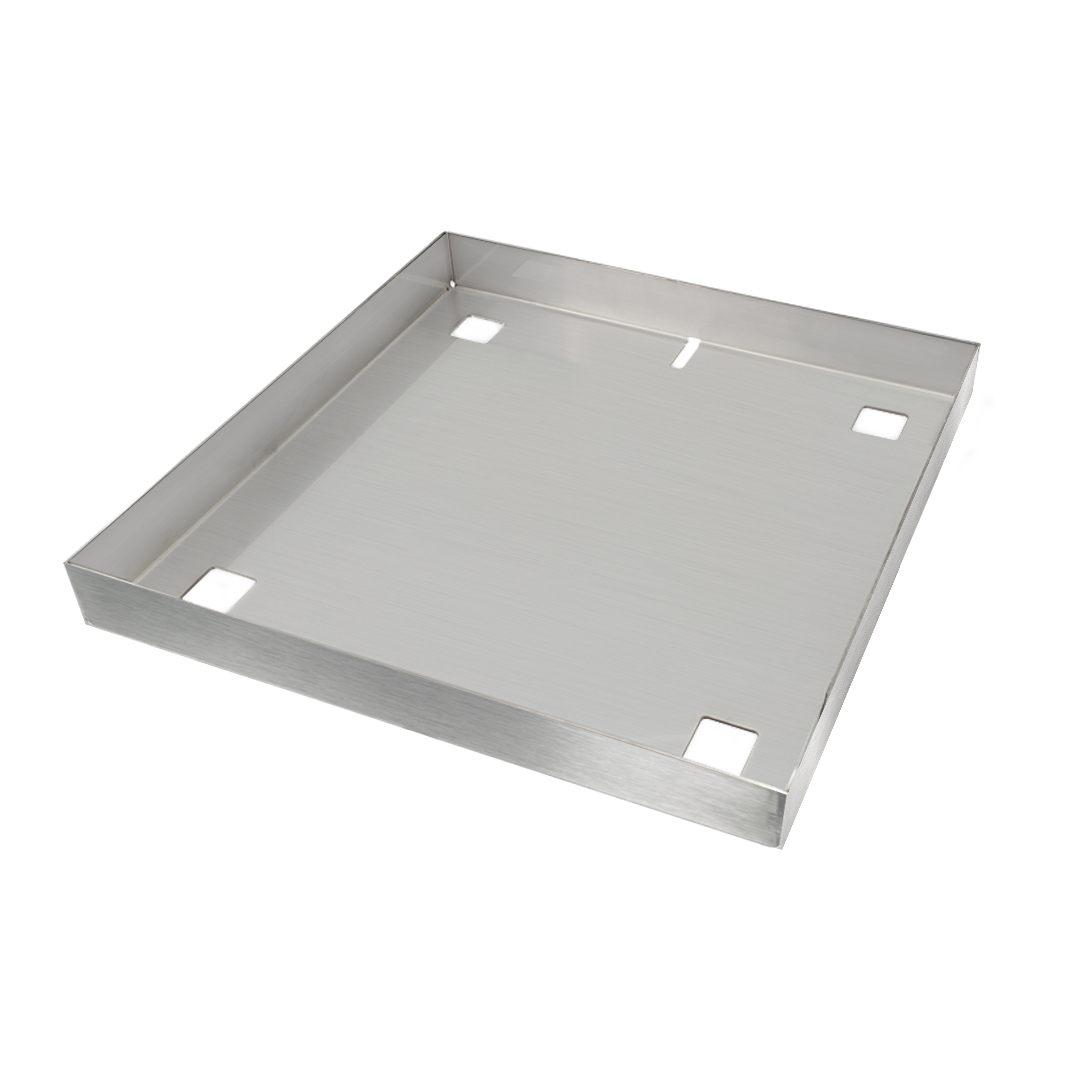
Edge Protector
Protective Frame for Landscaping Precision
Designed to accompany the Inlay Lid, the Edge Protector functions as a protective frame that sits on the outside perimeter of the lid. This feature is essential for safeguarding the coping and surrounds immediately adjacent to the lid against chips or breaks during operation. Additionally, it facilitates adequate drainage, thus preventing staining and leaching caused by water damage, maintaining the pristine condition of your landscaping elements.
Installation Considerations
- It's important to note that the Edge Protector is 15mm deeper than the lid. When preparing the bedding for installation, ensure to leave a recess to accommodate this extra depth.
- Also, you must leave an expansion gap around the Edge Protector. Fill this with flexible gap filler to match the colour of the grout.
Safety Key
High-Strength, Ergonomic Safety Key
Crafted from high-strength 316 stainless steel, our ergonomically designed safety key is precision-made to facilitate the safe and easy removal of the installed HIDE lid. This tool allows access to the contents within the skimmer while ensuring ease of use.
Important Safety Reminder
DO NOT LEAVE THE SAFETY KEY IN THE HIDE LID! Always store the HIDE Safety Key in a secure, childproof location, out of reach of children. It is crucial to return the key to its safe storage immediately after use to prevent children from accessing the skimmer, ensuring their safety and your peace of mind.
Adhesive
Specialized Adhesive for Inlay Lid Assembly
Our specially formulated adhesive is designed for use in assembling the inlay lid. It is perfect for securing the inlay tray and height adjuster (if required) to the inlay materials, ensuring a strong and durable bond.
Installation Guidelines
- Refer to the Contractor Installation Instructions for detailed guidance on applying the adhesive. Apply the adhesive in strips to ensure proper drainage. This method helps maintain the integrity of the installation while allowing water to drain effectively, preventing water damage and promoting longevity.
Height Adjuster
Precision Height Adjuster for Inlay Lid
Our Height Adjuster consists of a 2mm thick acrylic sheet that provides up to 8mm of additional height. It is specifically designed for situations where the chosen inlay material is too thin to achieve a flush finish within the inlay lid.
Application Guidelines
- When using the Height Adjuster, adhesive should be applied to both sides to secure it properly. For example, to achieve an 8mm adjustment, apply 3mm of adhesive, place the 2mm Adjuster, and then apply another 3mm of adhesive. This method ensures the adjuster remains securely in place while providing the necessary elevation.
Important Note on Usage
- Please remember that the Height Adjuster, although shaped similarly to the stone being cut, is not a template. To mark the cut for the key-way, use the key-way hole in the stainless steel lid to trace directly onto the stone, or refer to the measurements provided in the installation instructions. This precision ensures a perfect fit and alignment during installation.

Documents
Installation and Maintenance
Included with our products are the 'Contractor Installation Instructions,' which feature a QR code that directs installers to the most current advice on correct installation techniques. This ensures that every installation is performed to the highest standards, leveraging the latest insights and methods.
Homeowner Care and Maintenance
Also included is the Homeowner Care and Maintenance plus Warranty pamphlet. This document is essential for helping homeowners understand how to safely use and maintain their installation. QR codes within the pamphlet link directly to detailed information on proper cleaning procedures and warranty details, providing easy access to vital resources that ensure the longevity and safety of their investment.
Inlay Lid
High-Quality Construction for Durability and Aesthetics
HIDE exterior covers are constructed from marine-grade 316 stainless steel, known for its durability and resistance to corrosion. The fully welded corners ensure lid rigidity and prevent twisting, while all internal corners are rounded to facilitate close tolerance fitting of the inlay materials.
Versatile and Seamless Integration
The Inlay Lid can be fitted with a variety of materials such as tiles, pavers, decking, or concrete, chosen specifically for your landscaping project. This allows for a seamless, flush finish that integrates perfectly into your landscaped area. Additionally, the design protects the inlay materials from chipping or breakages when the lid is opened or closed, enhancing both functionality and longevity.
Installation Considerations
- Expansion and Contraction - To accommodate the natural expansion and contraction of the steel, it is important not to fill the void between the lid and the inlay material with grout or other fillers. Careful cutting of the stone is essential to ensure a neat finish. As specified in our installation instructions, a small gap must be maintained between the lid and the inlaid stone to prevent any pressure or damage.
Edge Protector
Protective Frame for Landscaping Precision
Designed to accompany the Inlay Lid, the Edge Protector functions as a protective frame that sits on the outside perimeter of the lid. This feature is essential for safeguarding the coping and surrounds immediately adjacent to the lid against chips or breaks during operation. Additionally, it facilitates adequate drainage, thus preventing staining and leaching caused by water damage, maintaining the pristine condition of your landscaping elements.
Installation Considerations
- It's important to note that the Edge Protector is 15mm deeper than the lid. When preparing the bedding for installation, ensure to leave a recess to accommodate this extra depth.
- Also, you must leave an expansion gap around the Edge Protector. Fill this with flexible gap filler to match the colour of the grout.
Safety Key
High-Strength, Ergonomic Safety Key
Crafted from high-strength 316 stainless steel, our ergonomically designed safety key is precision-made to facilitate the safe and easy removal of the installed HIDE lid. This tool allows access to the contents within the skimmer while ensuring ease of use.
Important Safety Reminder
DO NOT LEAVE THE SAFETY KEY IN THE HIDE LID! Always store the HIDE Safety Key in a secure, childproof location, out of reach of children. It is crucial to return the key to its safe storage immediately after use to prevent children from accessing the skimmer, ensuring their safety and your peace of mind.
Adhesive
Specialized Adhesive for Inlay Lid Assembly
Our specially formulated adhesive is designed for use in assembling the inlay lid. It is perfect for securing the inlay tray and height adjuster (if required) to the inlay materials, ensuring a strong and durable bond.
Installation Guidelines
- Refer to the Contractor Installation Instructions for detailed guidance on applying the adhesive. Apply the adhesive in strips to ensure proper drainage. This method helps maintain the integrity of the installation while allowing water to drain effectively, preventing water damage and promoting longevity.
Height Adjuster
Precision Height Adjuster for Inlay Lid
Our Height Adjuster consists of a 2mm thick acrylic sheet that provides up to 8mm of additional height. It is specifically designed for situations where the chosen inlay material is too thin to achieve a flush finish within the inlay lid.
Application Guidelines
- When using the Height Adjuster, adhesive should be applied to both sides to secure it properly. For example, to achieve an 8mm adjustment, apply 3mm of adhesive, place the 2mm Adjuster, and then apply another 3mm of adhesive. This method ensures the adjuster remains securely in place while providing the necessary elevation.
Important Note on Usage
- Please remember that the Height Adjuster, although shaped similarly to the stone being cut, is not a template. To mark the cut for the key-way, use the key-way hole in the stainless steel lid to trace directly onto the stone, or refer to the measurements provided in the installation instructions. This precision ensures a perfect fit and alignment during installation.
Documents
Installation and Maintenance
Included with our products are the 'Contractor Installation Instructions,' which feature a QR code that directs installers to the most current advice on correct installation techniques. This ensures that every installation is performed to the highest standards, leveraging the latest insights and methods.
Homeowner Care and Maintenance
Also included is the Homeowner Care and Maintenance plus Warranty pamphlet. This document is essential for helping homeowners understand how to safely use and maintain their installation. QR codes within the pamphlet link directly to detailed information on proper cleaning procedures and warranty details, providing easy access to vital resources that ensure the longevity and safety of their investment.
Backed by a 10 year warranty
When you choose a HIDE kit, you’re investing in a premium product backed by a 10-year warranty. Designed for durability and long-term performance, HIDE lids are made from high-grade stainless steel, ensuring safety and a seamless finish. With minimum maintenance required, our lids are built to withstand the elements.
HIDE’s warranty covers the Safety Key, the Inlay Lid, and the Edge Protector—unlike many traditional landscape lid options that suffer from durability issues, requiring frequent and costly replacements. Often, these alternatives offer little to no warranty coverage.

FAQs:
Can HIDE lids be retrofitted into existing landscapes?
Yes, HIDE lids can often replace existing skimmer or access covers. A professional contractor can assess and modify the existing opening to fit the appropriate HIDE lid size.
What inlay materials are compatible with HIDE lids?
HIDE lids can support various materials such as tiles, pavers, artificial turf, stone, timber decking, and wet-pour concrete. Inlay depths of HIDE Kits can handle materials up to 60mm thick.
What maintenance is required for HIDE lids?
HIDE lids are designed for durability with minimal maintenance. Regular checks and occasional cleaning will help maintain their appearance and functionality.
What should I do if I lose the Safety Key?
Replacement Safety Keys can be purchased, and it is crucial to store them securely and away from children. Proof of purchasing an authentic HIDE Kit is necessary. If stored correctly, broken keys are covered under warranty.
What are the issues with traditional plastic or bespoke skimmer covers (made by the pool builder or tiler)?
Traditional covers, especially plastic ones, can become brittle over time due to sun exposure, leading to cracks and breakage. Bespoke stone skimmer covers are usually made on site from a piece of matching stone without any supporting structure. They often crack or break and can become dangerous. They are not Pool Skimmer Cover Safety Compliant to AS 1926.3-2010 Read more about the HIDE Cover's pool safety compliance.


Remove trip & slip hazards
Why would you choose a traditional plastic cover when the skimmer box cover can be hidden with HIDE Covers?


Integrated patterns
Each HIDE kit contains comprehensive installation instructions (or a QR Code Linking you to it) with diagrams and a list of standard contractor tools required to complete the installation. The process is quick and easy for a professional contractor.
Please ensure you have engaged a licensed, suitably experienced contractor to install the HIDE product. Prior to commencing the installation, please ask your contractor to read the Installation manual thoroughly and follow the instructions closely when fitting.


Plan for a flush finish
For a seamless finish, the Edge Protector must be installed flush with the surface of the surrounding tile or concrete. This ensures a level transition between the HIDE lid and the surrounding area, eliminating trip hazards and maintaining a clean, integrated look. Proper installation requires precise height adjustment before securing the Edge Protector in place.
Always check for levelness before allowing the adhesive or concrete to set to ensure a perfect flush finish.
FAQ: HIDE Warranty
What does the HIDE warranty cover?
HIDE offers a 10-year warranty covering the Safety Key, Inlay Lid, and Edge Protector. This warranty ensures your HIDE cover is free from material and manufacturing defects under normal use.
Does the warranty cover rust or corrosion?
HIDE lids are crafted from marine-grade 316L stainless steel, known for high corrosion resistance. Despite this, environmental elements like salt exposure or pool chemicals may impact appearance. Regular cleaning preserves the finish, but warranty doesn't cover discoloration or tea staining.
What is not covered under the warranty?
The warranty does not cover:
- Damage from misuse, improper installation, or modifications
- Wear and tear, surface discoloration, or cosmetic changes
- Inlay material (stone, tile, or other finishes added to the lid)
How do I make a warranty claim?
Contact your HIDE distributor or retailer with proof of purchase, photos of the issue, and installation details. Claims will be assessed to determine eligibility under the warranty terms.
Downloads

Care & Maintenance
With a little routine care, your HIDE Cover will stay clean, corrosion-free, and beautifully seamless for years to come. Our Care & Maintenance page walks you through the do’s and don’ts—like avoiding harsh chemicals, preventing tea-staining, and using the right cleaning tools. Click to discover how easy it is to keep your HIDE Cover in top condition.

Electrical Compliance
For safety and peace of mind, it's important to ensure your HIDE Cover installation complies with local electrical regulations, including bonding or earthing where required. Our Electrical Compliance page offers helpful advice, explains when bonding may be necessary, and points you to local guidelines so you can stay compliant and confident on-site.
Blog posts

Choosing the right HIDE Kit
The Innovative Design of HIDE Skimmer Lids